Creating Unified Group Projects with Templates in CapCut Desktop Video Editor
Thursday, June 26, 2025
Group projects form a major chunk of learning and collaboration. They consolidate various ideas and skills to work towards a goal. Creating a video for a group project is not easy.
Group projects form a major chunk of learning and collaboration. They consolidate various ideas and skills to work towards a goal. Creating a video for a group project is not easy.
It is difficult to get everybody's contribution blended, and the final project seems like one effort. That is where CapCut Desktop Video Editor steps in.
It simplifies the process by providing templates that ensure everyone is on the same page. You can quickly make a professional-level video using these templates, even if you are doing it as a group.

CapCut Desktop Video Editor for Group Projects
CapCut Desktop Video Editor is ideal for group projects, with teamwork-supporting features. The template function maintains consistency in that it creates a standard reference point, so the style and direction of the video are uniform.
Like with text to speech software, the templates maintain visual consistency. Enhanced features such as color grading, text effects, and transitions also come in handy in CapCut PC to support collaboration and planning.
Such functions assist teams to produce neat, well-sequenced videos that effectively address the objectives of the project.
Templates: The Key to Coordinated Group Work
Consistent and Professional Appearance
Templates within CapCut Desktop Video Editor are ideal for attaining a professional and consistent appearance for group work. Templates help save time and create unified work by all members.
Templates help all the members begin from the same starting point of a basic design, hence the uniformity in the video. Such uniformity simplifies the task of keeping the video professionally styled.
Saving Time and Keeping it Uniform
Time-saving for templates is guaranteed, and allows every element of the video to use the same style. It is convenient for everyone to be consistent and deliver the same thing.
Whether it is text styles or colors, the template delivers consistency in all these aspects throughout the project.
Adjusting Templates to Specific Topics
Templating is easy to personalize. Users can change the text, colors, transitions, and more according to the theme of the project.
This allows templates to be used for various content types, whether it's an educational video or an ad campaign.
Advanced Customization with AI Video Generator
CapCut PC Desktop Video Editor also simplifies editing visuals. For professional-level editing, CapCut PC also includes functionalities such as the AI video generator, which assists in automatically developing some scenes or clips depending on your requirements.
This is convenient and adds an extra shot of creativity to your project.
CapCut Desktop: Not Free
CapCut Desktop Video Editor offers you basic features for free, but pays for some professional features. More flexibility is achievable using paid features like additional templates, effects, and additional export options.
If your team project needs the added features, you will have a better editing experience using the premium feature.
Installing CapCut Desktop Video Editor
Step 1: Download the Software
Download the app from the official CapCut website. Look for the download link for CapCut PC and click on it.
Step 2: Install the Software
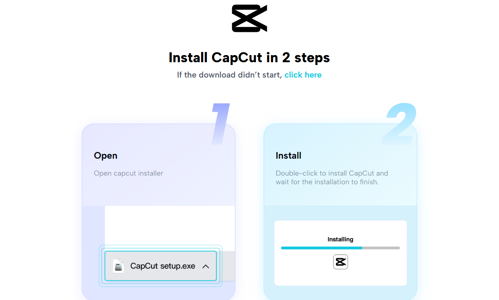
Once downloaded, open the installer and follow the instructions on the screen. It is fast and simple, leading you step by step.
Step 3: Sign Up or Log In
Once you've installed it, sign up or log in to your account so you can use CapCut Desktop Video Editor. You will then be granted full access to the program.
How to Use Templates on Group Projects
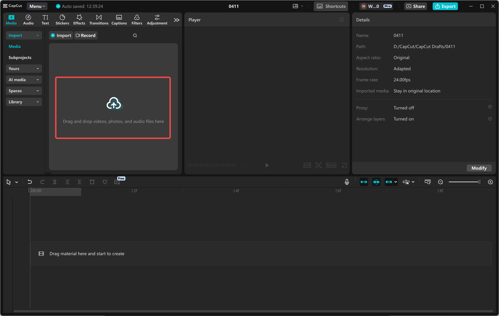
Step 1: Import the Project Files
The first step is to bring all the project files from different members. Any member can bring in his or her clips and assets and put them in CapCut Desktop Video Editor's shared project. This way, everything's in one source, which will be easier to work with.
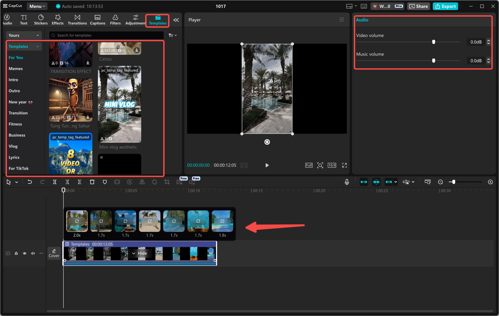
Step 2: Choose a Project Template
After you have uploaded all the files, you will have an option to choose a project template. CapCut Desktop Video Editor offers a selection of templates to choose from.
Browse through the options and choose one that suits the style of the project.
Step 3: Customize the Template
Now that we have made the general edits on our project template, it is time to make the template personal. Text, transitions, colors, and effects can be changed to match the theme of the project.
Contributions from individual members can be edited into the template so that the video looks and feels consistent.
For added audio effects for projects, utilizing a voice changer in CapCut Desktop can be employed to individualize the sound in different segments.
Step 4: Review and Finalize
Review the video before finalizing the project to make sure that all its components are finished in harmony.
Make sure all the segments are well-mixed with the overall style, and finalize the video for export. This will make the final output smooth and cohesive.
Exporting and Sharing the Final Project
Before exporting, lock the video settings like resolution and frame rate as per your needs. Then, export the project in the desired format with CapCut Desktop Video Editor's settings.
Once the video is prepared, share it with colleagues or post it on social media and file-sharing websites for presentation.

Conclusion
Working with templates within CapCut Desktop Video Editor makes it simple to build a smooth, cohesive group project. Templates are time-saving and ensure consistency in all sections.
Discover the free aspects of CapCut Desktop, and if necessary, pay to access more resources. Begin working on your group project today!